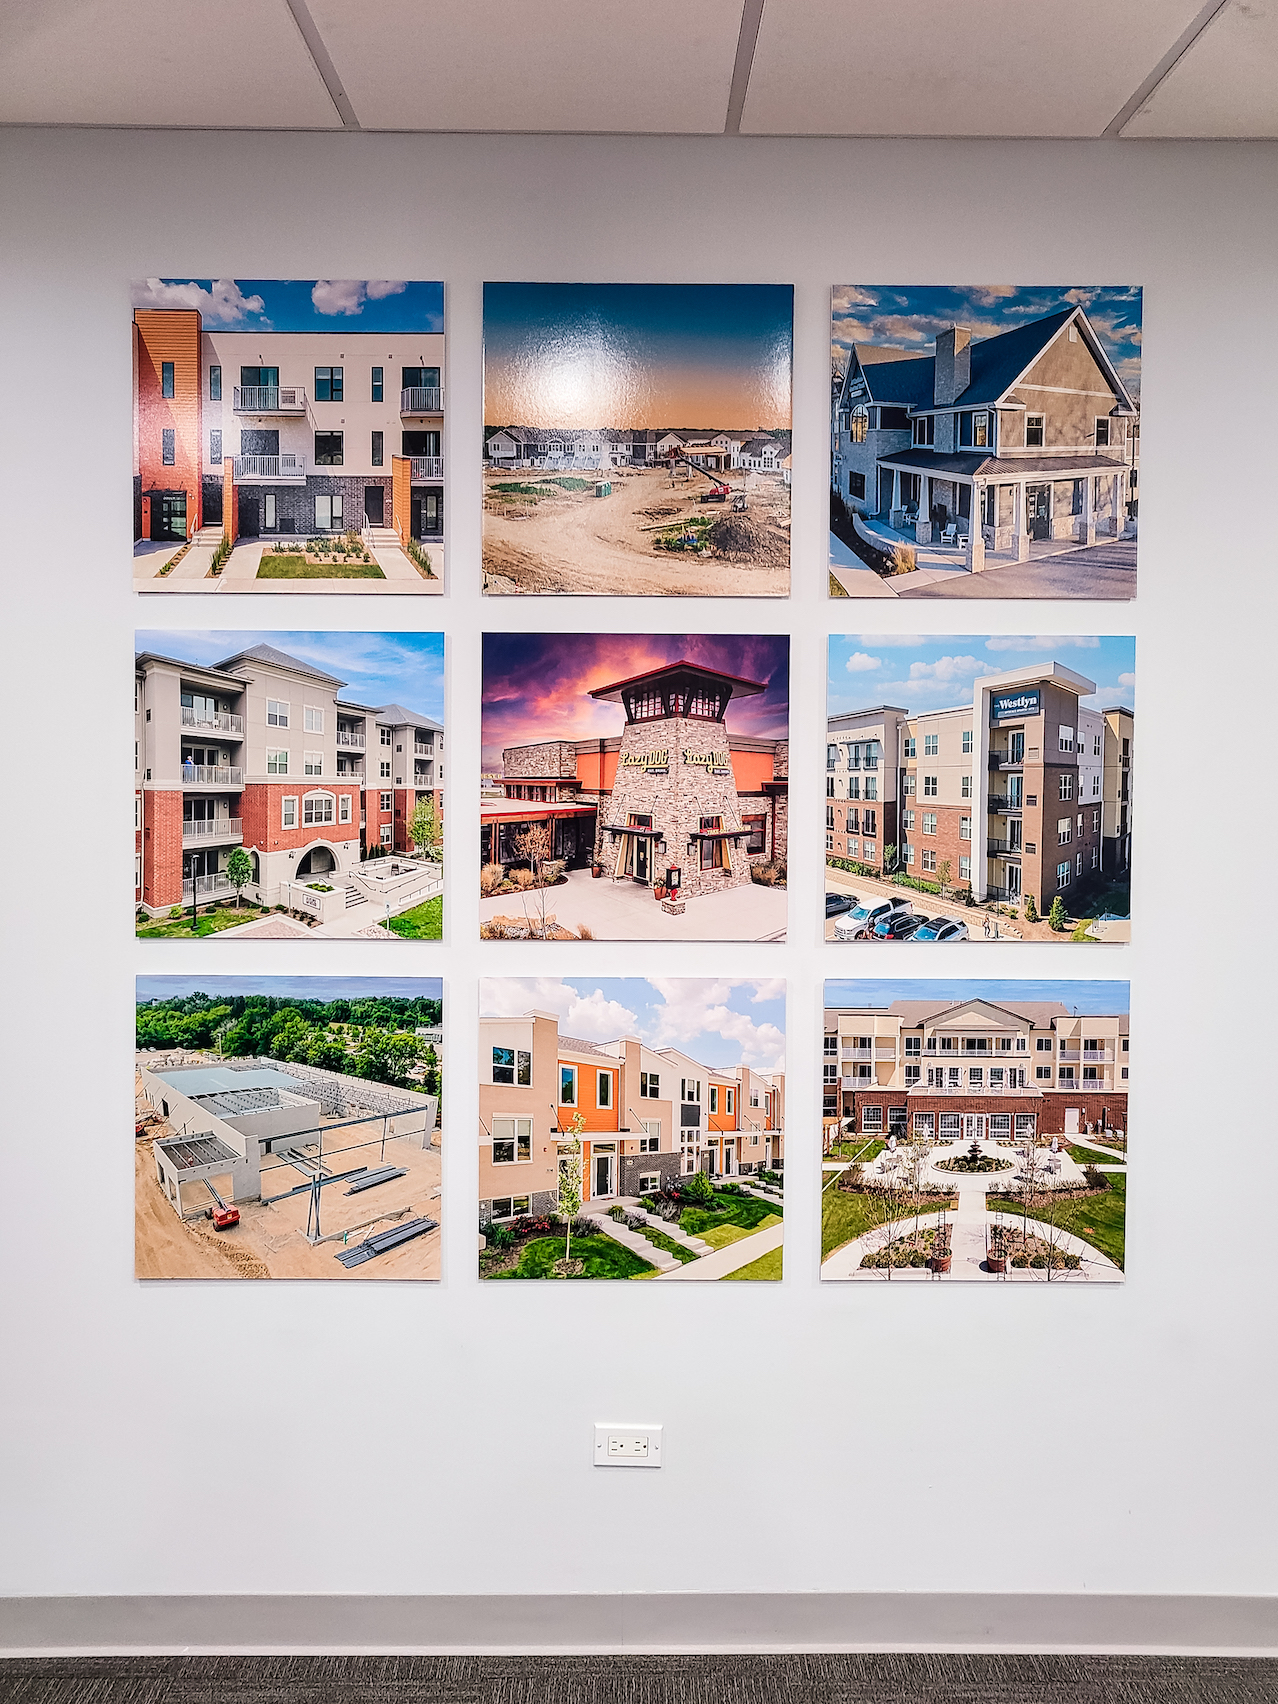
A curated display of photographs, posters, or prints creatively arranged on your wall can showcase construction expertise for current and potential clients
Gallery walls or photo walls have become quite popular over the last few years, providing an easy way to update your interiors, transform bland walls, create a focal point in your office and share your company’s character and personality with clients. Instead of using paint or wallpaper for your feature wall, you can highlight construction projects with a stunning gallery wall that can be placed anywhere in your office. Popular locations are often in your lobby, near your waiting area, or in a space where you meet with potential clients. Any highly visible or high-traffic area will work.
If creating a gallery wall in your office is something you’ve been putting off, now is the time to get it done. Jacob Willner, Chicago Masonry Construction’s Chief of Staff, recently created an office gallery wall to showcase CMC’s full-service masonry, EIFS/stucco and caulking services. CMC is a masonry contractor serving architects, construction managers, condominium associations, developers, general contractors, homeowners, and both private and public institutions. Chicago Masonry has proudly served the greater Chicago area and the Midwest since 1996, completing hundreds of commercial construction projects. By using a gallery wall, the CMC team is able to display the highest level of masonry workmanship and showcase partners in construction.
Creating a gallery wall does not need to be complex, expensive or time consuming. It’s all about designing a display that allows your clients to envision the final product they will receive if they hire you. Experiment with a variety of photos that span colors, project sizes, project costs and project materials. The goal is to show you can meet the needs of various clients.
Have an idea of the projects you would like to display in your gallery? CMC’s Jacob Willner will talk you through how to build the perfect gallery wall for your office:
- Take photos
Start by visiting the job sites you wish to highlight on your gallery wall to take photos. Willner used a Nikon DSLR Camera as well as a drone. He has the Mavic 2 Pro, which is no longer in production, as the Mavic 3 Pro is the latest model.
- Organize your photos
Now that you have the photos, it’s time to choose the best images for your gallery wall. Reduce your image editing time by culling your photos using a program like Adobe Lightroom. By culling, or reducing the total number of final images, you’re speeding up the time required to edit your shoot. This presents only your best work and helps you be more selective.
Willner also used Adobe Lightroom to process, color correct, sharpen, and make curve adjustments, to the raw files. He encourages you to use the “Enhance” feature in Adobe Illustrator to greatly enhance the pixels in the image for large printing.
- Use a photo editor, like Photoshop
Use Photoshop to remove any distractions from the photo. Remember you want all the focus to be on your expertise and craftsmanship. Willner’s personal favorite feature to use in Adobe Illustrator during the photoshop process is the Sky Replacement tool. He says it’s incredible!
- Print time
To capture the dramatic statement that the CMC team created on their gallery wall, print your photos to the size of 20 x 20. Willner chose a double-weight matboard with lustre coating. He decided a frameless look would be more cost-effective. After shopping around at Michael’s, it was determined that this look was the most cost effective, as the cost of frames needed was at least $1300. You can also keep your gallery wall up-to-date by replacing photos as new projects are completed.
- Decide on the layout
Willner decided he wanted the gallery wall to be in neat rows. Before he hung anything on the wall, he set up his collection of photos out on the floor. The goal was to balance the images’ colors and composition. He placed the most vibrant image in the middle.
- Measure up
Willner used a 3-ft level and a torpedo level to equally space all the photos 2.5-in. apart (width of the torpedo level). He leveled the center image and then used a pencil to mark its place on the wall. It is important to use a ruler to measure the middle of the center gallery wall photo, in Willner’s case it was 57-in. Once that is correctly measured, you can build everything around it, measuring each the same in every direction.
- Hanging
Since they did not use photo frames, no hammer and nails were required! Willner ordered Command™ Medium Picture Hanging Strips | 3M. Place one piece of velcro on each side and follow the directions to hang on the package. After setting the center image on the wall at the center mark, place the level on the top of the image and on the side to ensure the picture is perfectly straight. Once it is placed how you would like it, press firmly against the wall. Follow the same directions for the other images, working your way from the center to the outside. It may be beneficial to ask a colleague to help level each side of the photo, to ensure all sides are straight. Use a Magic Eraser to remove any pencil markings from the wall.
- Final look
Stand back, enjoy, and show off your final product to your office co-workers. Remember your gallery can easily be swapped or updated with new project photos whenever you like. Just decide what you want to take down, and the command picture hanging strips peel from the wall without damage. Use a new strip to hang your newest photos.
Chicago Masonry Construction is a full-service commercial masonry, EIFS/stucco and caulking contractor serving architects, construction managers, condominium associations, developers, general contractors, homeowners and both private and public institutions since 1986.
